Troubleshooting: node_modules/@types/react/index.d.ts – error TS2717


If you encoutner the captioned error when building a react app using typescript, you are not alone, There are bunch of solutions discussed on the internet:

However, none of them worked for me. Finally I found the approach below works:

In the package.json, add below code:

"resolutions": {
  "@types/react": "^16.14.3"  <-- replace the version as you see fit
}

In tsconfig.json, at the end of the file, add below code

 "skipLibCheck": true

Note that if you have multiple project in a root node project, for instance, if you are using Capacitor to add Android, iOS and Electron platforms, you might do so for all the package.json and tsconfig.json files.

Rebuild the project and rerun your apps. Happy coding!

Using Intellij Idea as a Markdown Editor


Markdown is a lightweight markup language with plain text formatting syntax. Markdown is often used to format readme files, for writing messages in online discussion forums, and to create rich text using a plain text editor.

There are many Markdown editors, refer to this article, The 10 Best Markdown Editors of 2018 to get a list of popular Markdown editors.

As a programmer, you may be already very familiar with Intellig Idea, as a powerful code editor and IDE, but what you may not be aware, is that, it is also a great Markdown Editor!

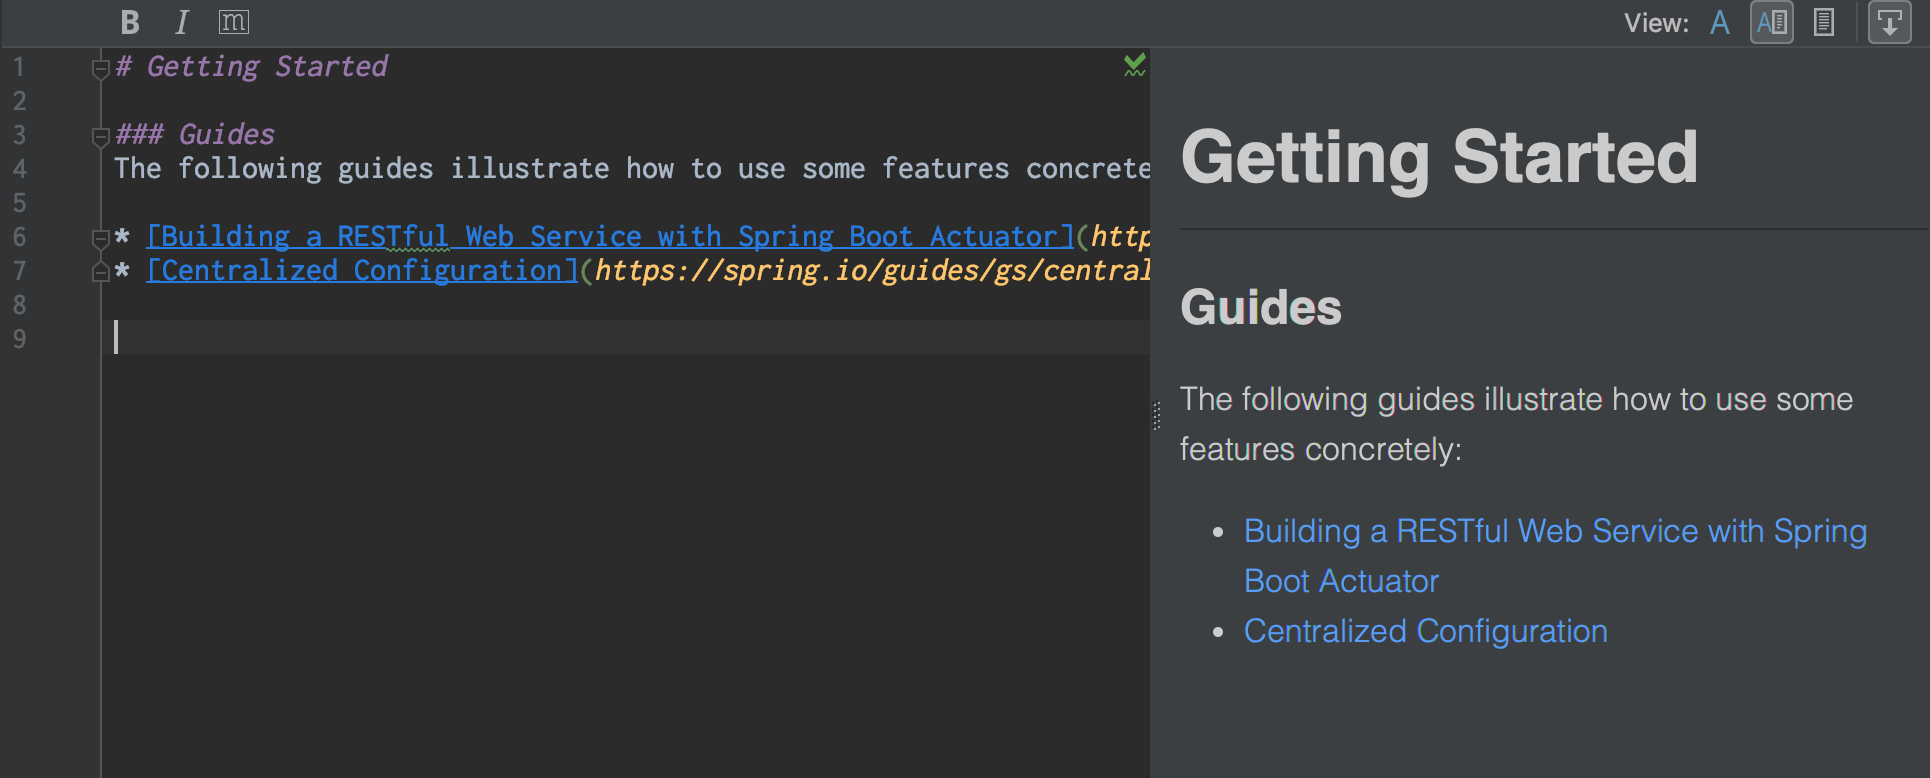
What is cool about Intellij Idea’s Markdown editing feature is that, it offers a visual feedback along the way you edit it.

intellig markdown

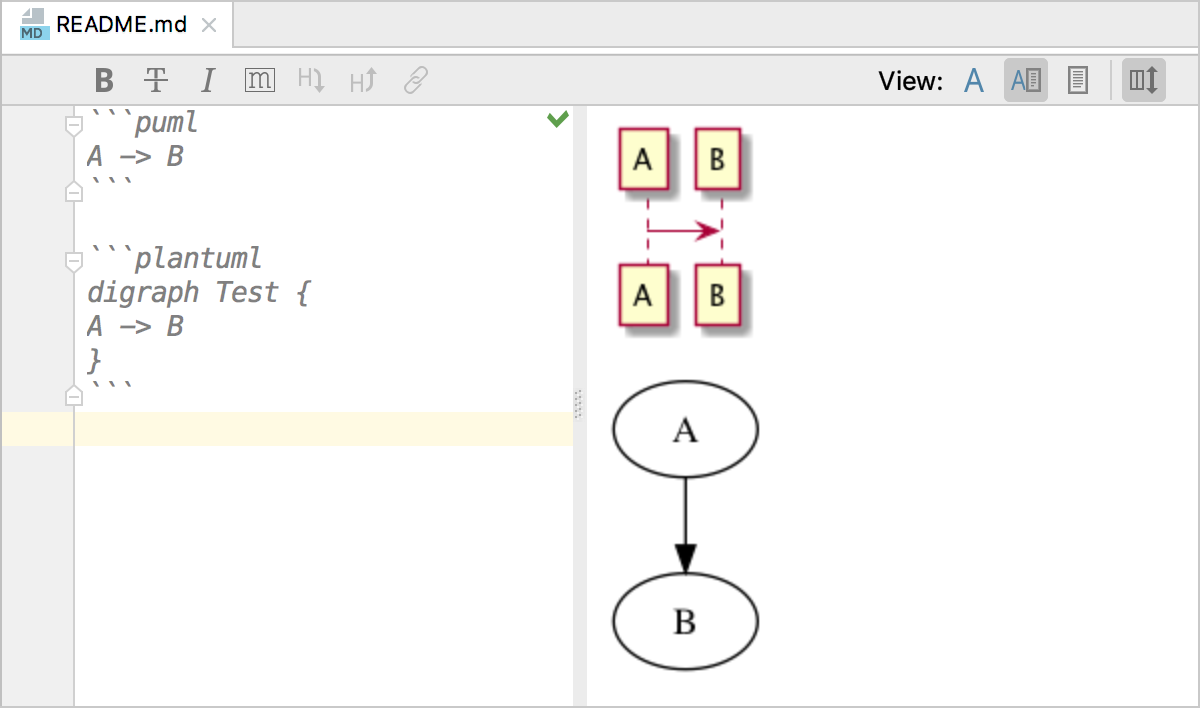
On top of that, IntelliJ IDEA even supports visualizing diagrams in the Markdown and preview it using the DOT and PlantUML diagramming languages.

PlantUML diagrams in markdown

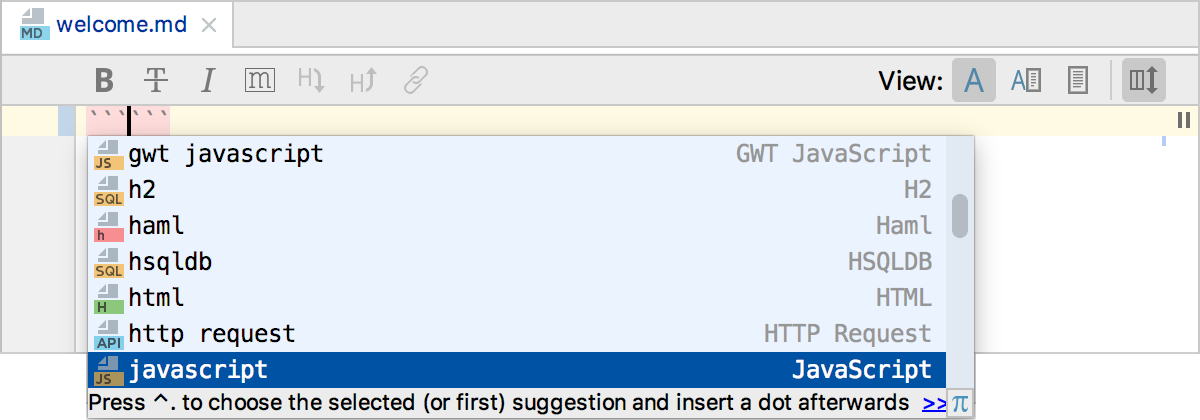
For programmers, you may frequently wish to insert fenced code blocks for different languages, this can be done by placing triple backticks (“`) before and after the code block, it is a breeze!

Markdown insert a fenced code block

Surprise? It is!

Intellij Idea offers free community Edition and for students, there is also free Educational license! Enjoy that and make your life easier!

Ramda function explained: lens


Ramda is a practical functional library for JavaScript programmers. It follows functional programming paradigm, and official doc for lens is shown here. One of the limitation of ramda is that its docuementation is too abstract and the learning curve is just too steep!

In this series of articles,  ramda functions are going to be explained in an intuitive ways so that usage of Ramda is straightforward.

The 1st article of this series is on lens or a family of functions related to lens.

First let’s ask a simple question, why is the function named “lens”? Understanding why is important, it makes one easily recall which function to use in ramda, without referring to the doc again and look for a candidate function among hunderds of them.

Lens make it focus, full stop.

lens-1209823_1280

With lens, you do not see the whole picture, but parts of it, yet with much more details. That fully describes what lens is.

Analogous to this, if you have a very large amount of data, but your interest is not on the whole data set, but parts of it, and you want to manipulate it, read, write, delete …… That is where lens come into play.

With this understanding, you will never forget what lens is!

Example 1: Use lens to access/read data:

const input = ['a', 'b', 'c']
const o1 = view(lensIndex(0), input);            //=> 'a'

Here, lensIndex(0) tells us we are using lens to focus on the first element, that is it. But hold on, we know lens allow you to view the object, but lens is not the object it self! That is why we have a related function view, which returns the element itself.

Emmmm, I can easily do the same thing as below, why bother?

const input = ['a', 'b', 'c']
const o1 = input[0]                              //=> 'a'

Absolutely right! But consider the following example:

const input = {
  id: 'a1',
  features: [
    {
      id: 'f1',
      children: [
        { id: 'c1' }
      ]
    },
    {
      id: 'f2',
      children: [
        { id: 'c2' },
        { id: 'c3' }
      ]
    }
  ]
};

How do you get/focus ‘c2‘ in this? There is no trivial solutions. That is where lensPath come into play:

const o1= view(lensPath(['features', 1, 'children', 0, 'id']), input) //c2

Wow! That is really powerful! It reads naturally like this:

const o1= input ['features'] [1] [ 'children'] [0].'id']

Equally, we can also set the value along that path:

const output = set(lensPath(['features', 1, 'children', 0, 'id']), 'x100', input)

and now output is:

{
    features: [
        {
            children: [
                {
                    id: "c1"
                }
            ],
            id: "f1"
        },
        {
            children: [
                {
                    id: "x100"   // <---- updated
                },
                {
                    id: "c3"
                }
            ],
            id: "f2"
        }
    ],
    id: "a1"
}

If your path to the location of interest is very simple, you can also use lensProp to replace lensPath:

const o2= view(lensProp('features'), input) ;

and now O2 is

[
    {
        id: "f1"
        children: [
            {
                id: "c1"
            }
        ],

    },
    {
        id: "f2"
        children: [
            {
                id: "c2"
            },
            {
                id: "c3"
            }
        ],

    }
]

That is it.

To recap, you can use lensIndex, lensProp and lensPath to locate the data of interest, this is analogous to use a lens to focus on specific fields. And then you can use view, set to read/write the values.

Happy coding.

‘vue’ is not recognized as an internal or external command, operable program or batch file.


Following the instruction from vue official site, I installed vue-cli via below command in termal:

npm install -g @vue/cli
# OR
yarn global add @vue/cli

For me I used the latter. And then when I fire the command:

vue –version

Then an error pops up:
‘vue’ is not recognized as an internal or external command, operable program or batch file.

I searched for a few placed in the internet, and many recommended adding the path where vue is installed, e.g.

  • C:\Users\{yourName}\AppData\Roaming\npm
  • C:\Program Files\nodejs

But none of these works. Finally I used Everything Search to find the vue.cmd, and it was located here:

C:\Users\{YourAccount}\AppData\Local\Yarn\bin

After adding this to system path, and restart my command window/terminal, now it works:

vue –version
3.4.1

Flutter: Could not install build/ios/iphoneos/Runner.app


When running flutter apps on the device, sometimes you may encounter the captioned error message as following (either from Android Studio, Intelligidea or CLI):

Could not install build/ios/iphoneos/Runner.app

To resolve this, try below measures, preferably sequentially in terminal:

cd "$(xcrun --sdk iphoneos -- show-sdk-platform-path)/DeviceSupport"
sudo ln -s 10.3.1\ \(14E8301\) 10.3

After running these commands, it should work fine, and if not, try run this command below in terminal:

flutter clean

Re-run the app, now it works like a charm.

Happy coding!

Vuforia: Delayed Initialization Explained


Vuforial is a widely used AR toolkit, and if you use it for some time, you will find “Delayed Initialization” for sure.

image

You would like to try it, right?

Go and do it, cry please, you will see below errors:

Vuforia cannot be started before it is initialized.Please disable Delayed Initialization in the Vuforia configuration or initialize Vuforia manually with the VuforiaRuntime-class.

image

You would Google this, frustrated, as you can hardly find good answers, and here is why this article comes into play. Continue reading “Vuforia: Delayed Initialization Explained”

React Native: “No dimensions set for key window” error and solution


In my recent project, I created a brand new React-native project, and run that on the simulator, then the captioned error pops up:

“No dimensions set for key window”

What hell does this mean? After a quick search on the internet, we found the solution: it turns out that the terminal (Mac) or the command line window is running for quite some time, and for unknown reasons, some of the information is outdated, which results in the captioned errors.

So the solution is simple:

  • Turn off all the terminal instances, restart the terminal/command line window,
  • Re-run the command:  react-native run-ios

That is it! Happy coding!

Learn React VR: A great tutorial series deserving a good read


Chapter 1 | Hello Virtual World
Chapter 2 | Panoramic Road Trip
Chapter 3 | Outdoor Movie Theater
Chapter 4 | Transitions and Animations
Chapter 5 | Star Wars Modeling
Chapter 6 | Vector Graphic Exploration
Chapter 7 | UI/UX Principles for VR Design
Chapter 8 | Building a VR Video App
Chapter 9 | Reacting to Our Exploration

Please support Michael Mangialardi either by up-voting his articles as shown above or purchase his git book.

Enjoy!

‘com.github.dcendents.android-maven’ not found, the solution


Recently, I build some open source Android libraries, and when building the project, below error occurred:

Error:(2, 0) Plugin with id ‘com.github.dcendents.android-maven’ not found.

Quick Solution:

install Yarn, everything works!

Mac: brew install yarn
Windows: refer to this link.


A less elegant solution is to manually change the top level build.gradle:

From

dependencies {
classpath ‘com.android.tools.build:gradle:2.2.2’
}

To –>

dependencies {
classpath ‘com.android.tools.build:gradle:2.2.2’
classpath com.github.dcendents:android-maven-gradle-plugin:1.5  //Add this
classpath com.jfrog.bintray.gradle:gradle-bintray-plugin:1.7.3      //Add this

}

Rebuild. It should work. But this is tedious, for every project (e.g. react-native), you repeat doing so?  Emmmmmm!

Now try to create a new react-native project using:

react-native init ProjectName

Run the project:

react-native run-android  // or
react-native run-ios

It compiles and works! Happy coding.